Nuke Quicktip: Building a GrainQC node

Arguably, one of the most important tasks as a compositor is to match grain. This is not a one-step process, you need to apply and adjust grain carefully and precisely. To match it though, you need to be able to see it.
In this quicktip, we are building a GrainQC node in Nuke that you can use to check grain accuracy. Let’s Start!

get started video games GIF

In a new Nuke Comp add a ”Log2Lin” node to convert the workspace from linear to logarithmic. This because log retains the most dynamic range of information by encoding what the camera sees logarithmically.

Building a GrainQC node colourspace transform

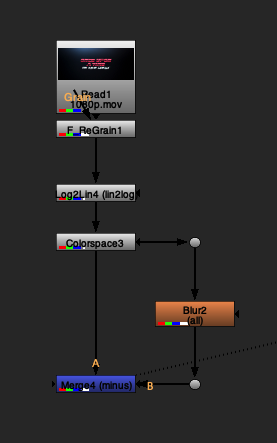
Now we need to sample the grain in dark areas. We do this by changing the colourspace to Cineon and blurring the RGB in a separate pipe minusing it under A. We can substitute this process simply with a ‘laplacian” node.

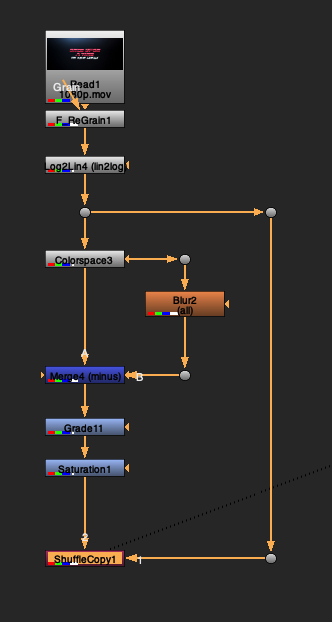
To make the grain more visible, we increase the gain as well as the saturation. In this case respectively to 100 and by 3.

The last step for this section is to copy the original alpha into our current pipe.

Building a GrainQC node grading

We can now duplicate this section, removing the ”Log2Lin” node and increasing the gain to 500. We will use this pipe to sample the grain in bright areas.

Building a GrainQC node bright areas

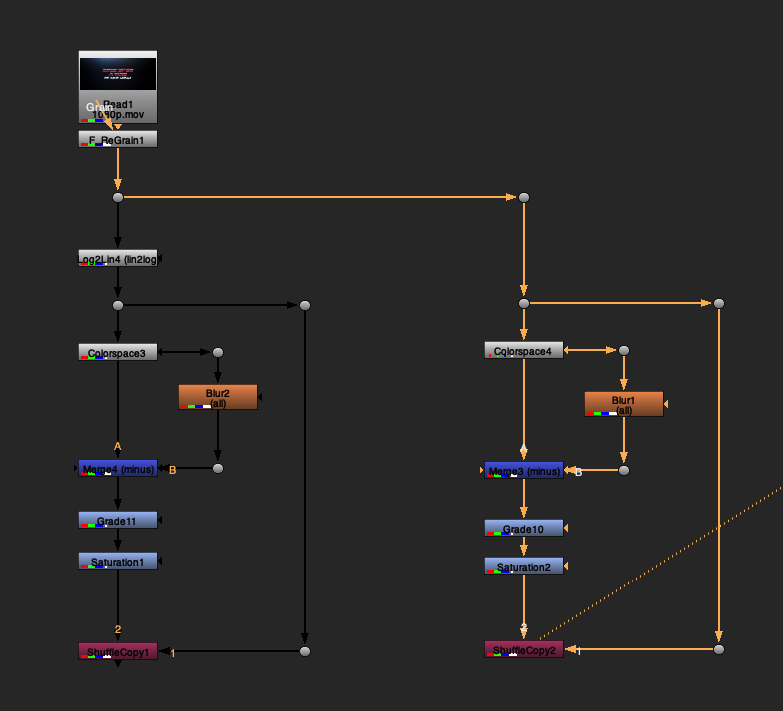
To recap, the left section is sampling grain in dark areas and the right section is sampling in bright areas. This is pivital when building a GrainQC node since we want to see grain patterns in all areas of the scan.
We can now max both pipes together and plus the output over the original input.

Building a GrainQC node dark and bright area merged

This is what the full script should look like. Our gizmo is nearly done!

The last step is to group these nodes by pressing (Ctrl+G / Cmd+G) and setting the last node as the group’s output (in this case the merge “plus” node).

Building a GrainQC node test footage

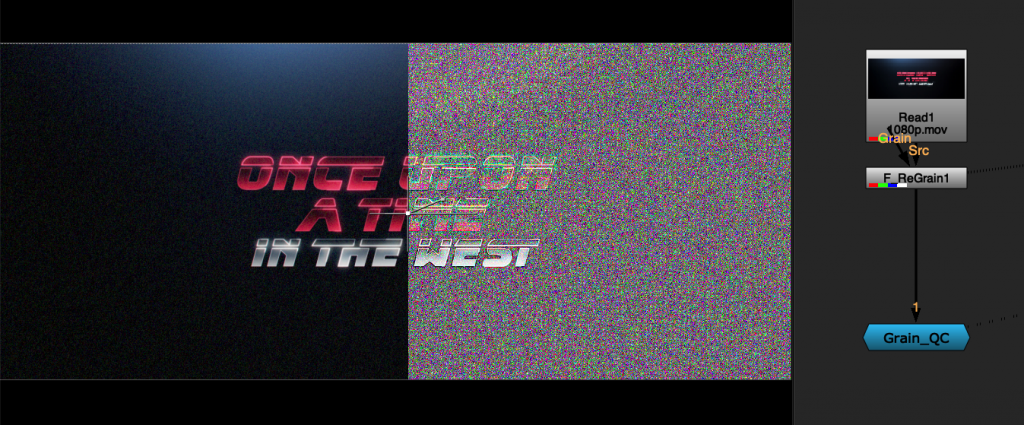
This is the final result! Now we have a GrainQC node that we can save in a text document for safekeeping or add to our Nuke toolset.

Check out my blogpost where I teach you an effective regrain setup for your scans in Nuke.

Similary, if you want a grain checker that works in Nuke Studio, have a look at this tool by the awesome Mads Hagbarth Damsbo.

leaving see ya GIF

Until next time…

Nuke Quicktip: Regrain Setup

A pivital point in compositing CG on a live action scan is grain matching. In this Nuke Quicktip I am going to show you an effective regrain setup using a difference keyer and a nifty expression.

When re-graining something to apply to a live-action plate, a problem I see a lot is doubling up of grain. Mainly caused by applying grain to the whole working area, not just masked by the alpha of what you are merging.

Martin Lawrence No GIF

Another problem comes when grain is applied to a patch with semi-transparent edges. This will double up the grain around the edges of the patch because it has values between 0 and 1.

To avoid encountering these issues when tech checking, use this simple setup to regrain all of your shots.

Regrain Setup Breakdown

The principle of this setup is to apply the patch to the whole denoised plate, making sure it sits properly.
Then copying back the hard edged alpha of the patch through a differecne key.
Finally re-graining it, premultiplying it and merging it over the original scan.

In practice, the setup would look something like this.

Regrain Setup Nuke Script

The difference node takes the difference between the original denoised plate and the patched denoised plate. We use it to create an alpha where the patches exist.

The expression sees if the values in the alpha are bigger than 0.0000001 and rounds them to 1 if not, to 0. This expression is used to achieve a hard edge matte, to avoid semi-transparent areas when re-graining.

If you want to learn how to create a GrainQC node in Nuke check out my other blog post! You will learn how to effectively quality control the grain in your shot. This way you test this new regrain setup on your shots.

Credit
Neil Alford
2D Lead