

Hey, you! Long time no see… Hope you’ve been good.
Today I am going to teach you how to use a uv pass from a 3D render to add some texture to your subject. Let’s get stuck in!
I will use one of my personal projects as an example.
Recently, I went out to shoot a few plates with the intention of integrating a CGI car into one of them.
After the careful process of gathering all shoot data, picking the proper take, tracking/match-moving it and creating a full lens distortion and overscan pipeline for it, it was time for the CG side of things. That’s when I called in a friend of mine to lend a helping hand.
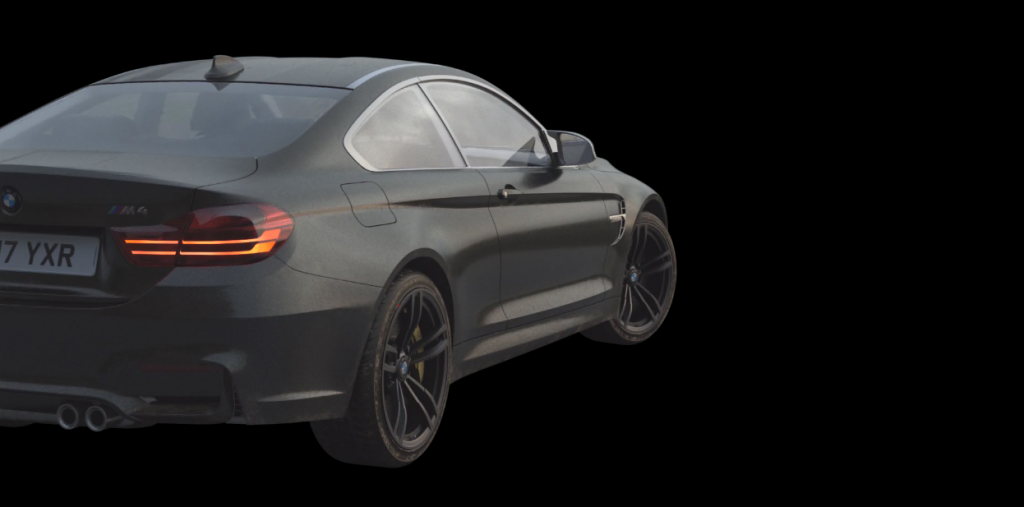
We started with just one frame to save render times. This way we checked that everything was working visually before setting up the whole sequence to render.

With a few basic adjustments, the car looked good! Nonetheless, I wanted to make it look even more convincing, so I started to think as if the car was actually there.
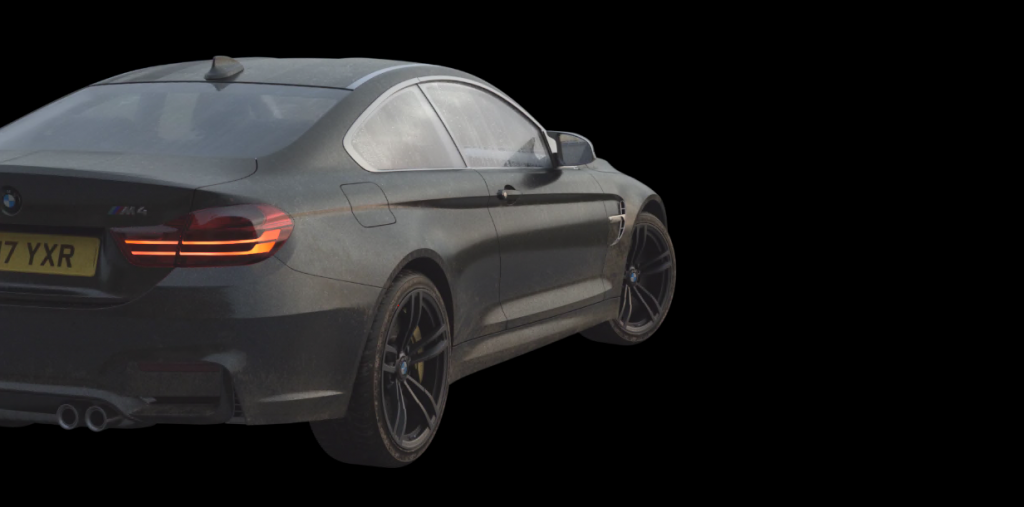
Hypothetically, by the time the car had driven over sand, near water onto this sort of brick podium, it definitely won’t be “brand spanking new”.
Therefore I thought that adding a few mud splashes, dry water drips on the bodywork and condensation on the windows. This would make it look more natural and less like a showroom car toed on set for a commercial shoot.
Let’s not forget the set interaction as well. If the wheels are dirty, you can bet that they would leave tire marks on the floor.
With all of this, you might think… Send it back to 3D

No way! We can easily do this in Nuke with UV passes.
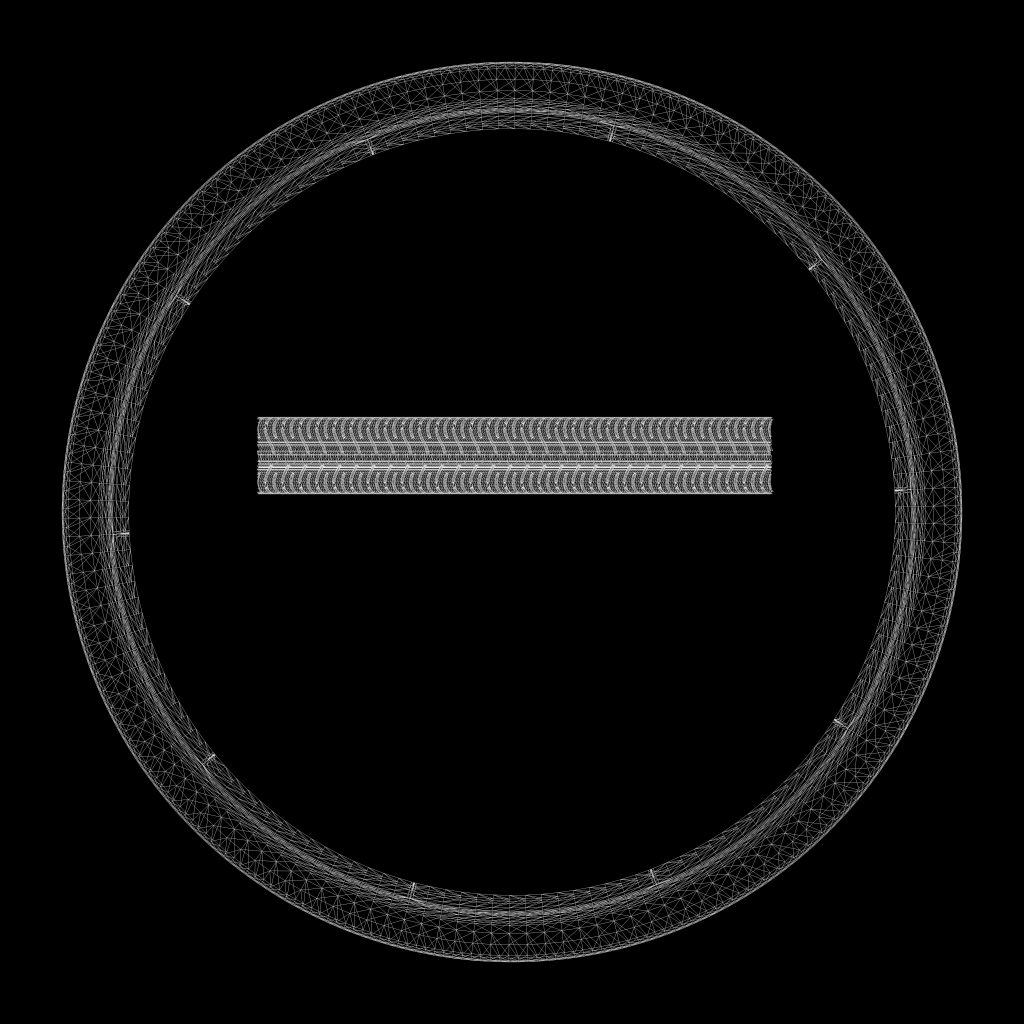
For this to work, you need to make sure that your 3D model is properly UV unwrapped.
This will give us complete flexibility over where and what type of texture we want. As well as minimising wasted time spent on rendering back and forth.
To start you will need exported UV nets of your 3d model. They should look something like this.


You can now gather your textures and position them roughly where you want them (checking by merging them over your nets),
Once positioned, stick them through a STMap node with the UV pass as the “stmap”.
To cut out only the areas that you need to texture, I recommend multiplying the result by IDs or cryptomattes.
After layering a few textures I achieved something like this.
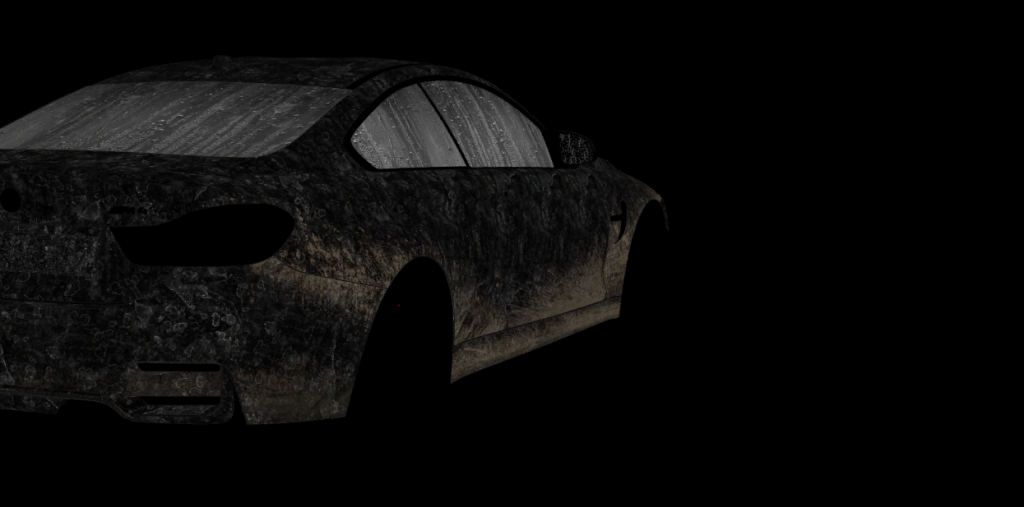
Pretty neat right! Of course, you don’t have to limit yourself to just textures, you could even add some decals. The world is your oyster…
I hope that this post helped you on your journey to becoming a more rounded compositor as well as strengthening your relationship with your fellow 3D artists! Catch you later.
